Originally Posted By jntmjt1: A few weeks ago, I posted some pictures of a 25 round
magazine. It is a replica of the very early prototype magazine as pictured in the post below:
http://www.ar15.com/forums/topic.html?b=3&f=123&t=503479
There were several members who requested information on how I made the magazine. Forum member OlGunner sent me two
magazines to work on. I used to them make an instructional guide on constructing a 25 round magazine replica.
The good news is this only takes some very cheap, basic hand tools. No electricity or pneumatic tools are required!
Here's what you'll need:
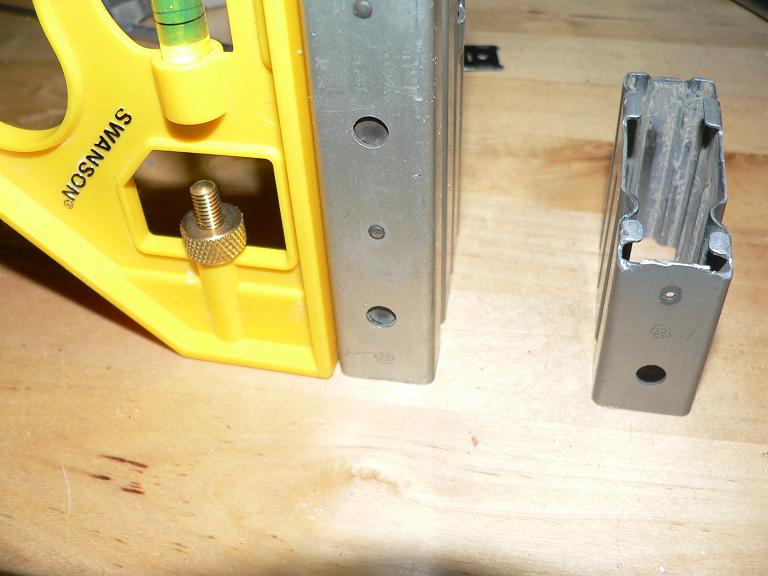
Small vice
Small square with level
Hacksaw with sharp, fine-toothed blade
Large flat file
Small rat tail file
Flat jewelers file
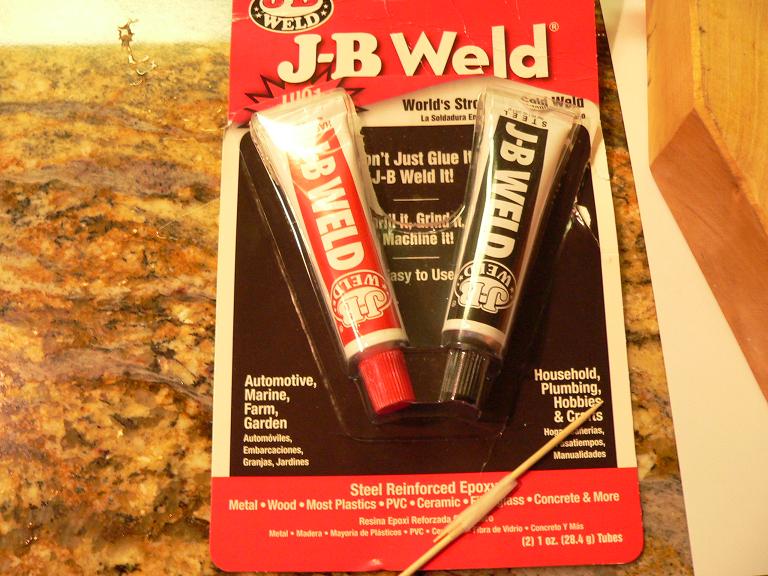
JB Weld
Toothpicks
12 inch wood clamp (I got mine at Big Lots for approx $5)
Scribe
Straight edge
Ruler
Sandpaper (180 grit, 320 grit, 800 grit)
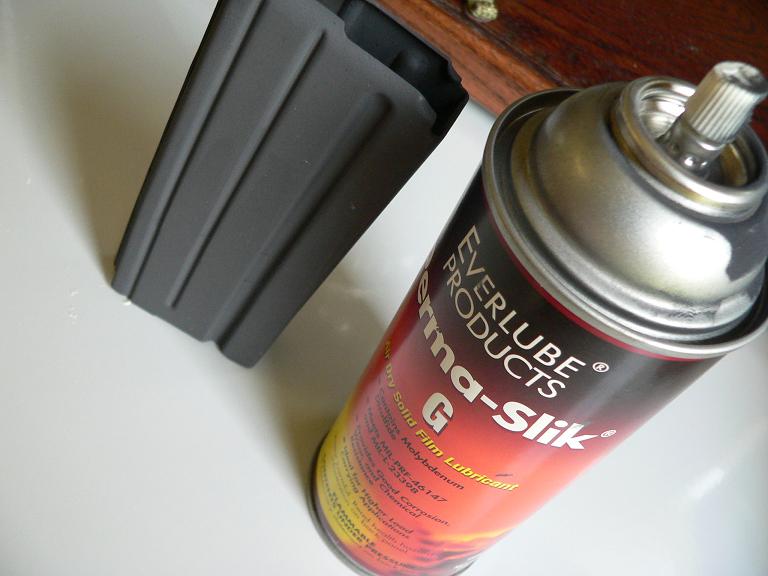
Perma-Slik dry film lube
Green paint (optional)
Vaseline (optional)
Small paintbursh (optional)
Patience (mandatory)
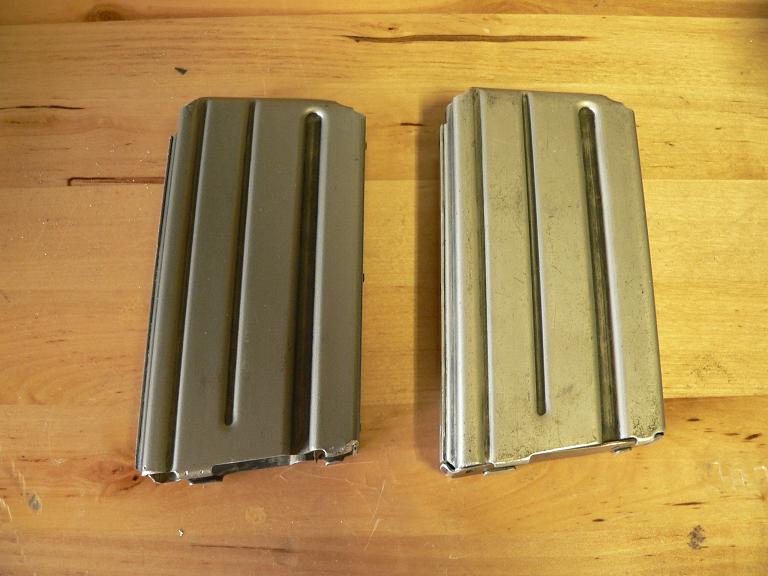
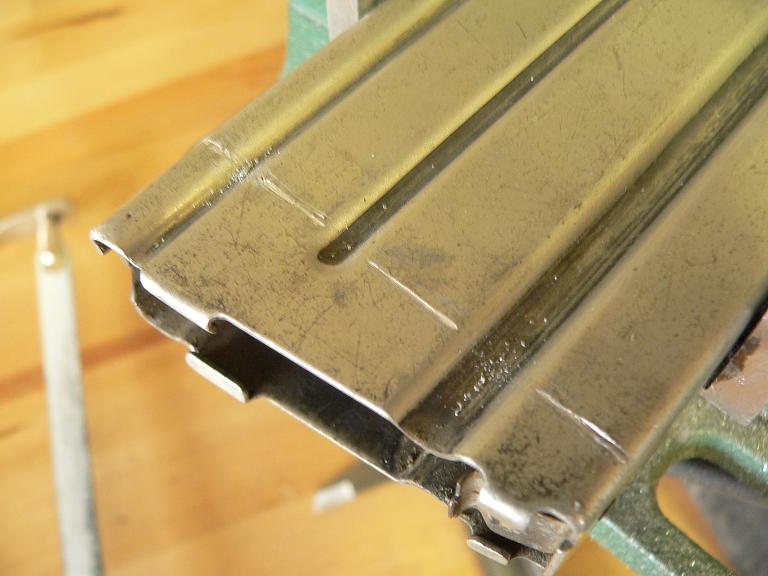
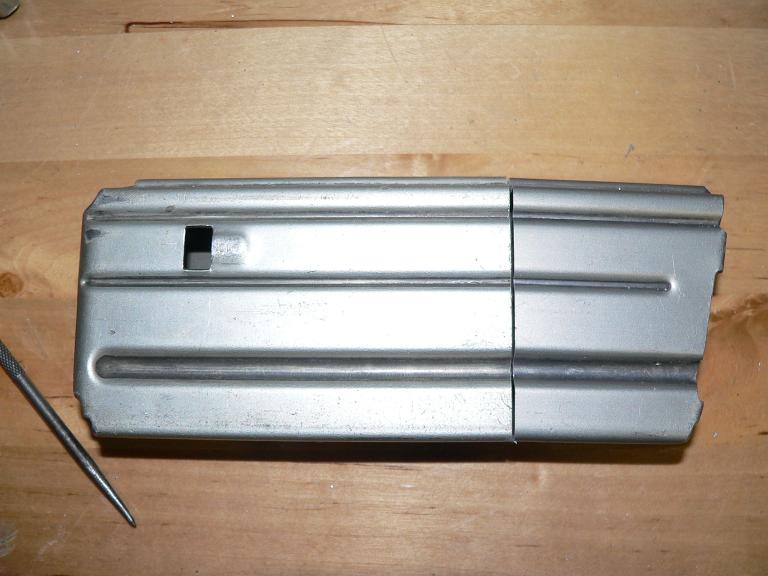
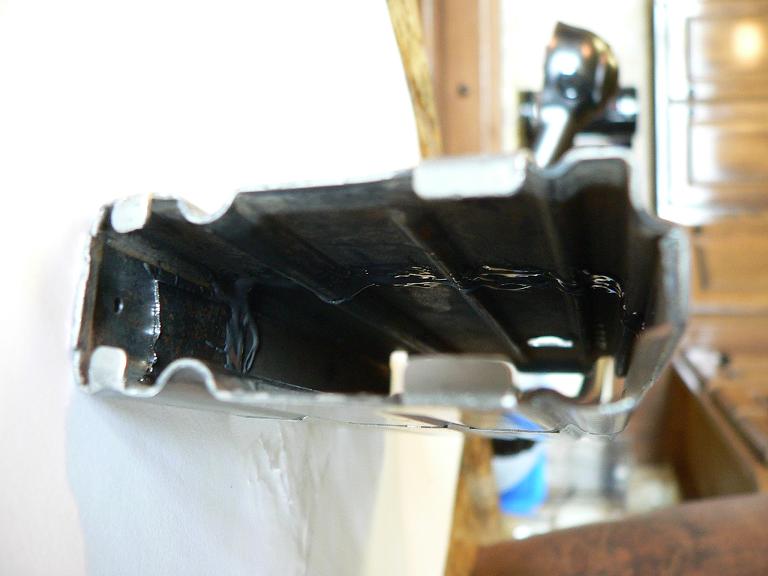
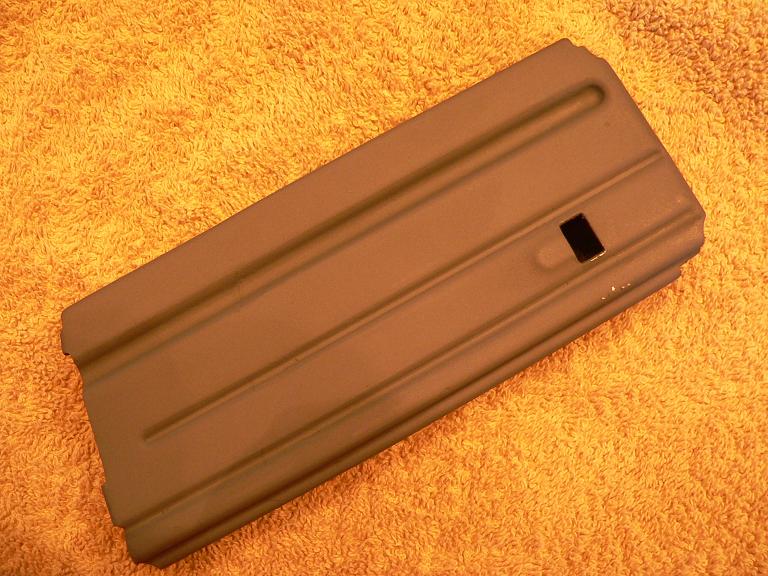
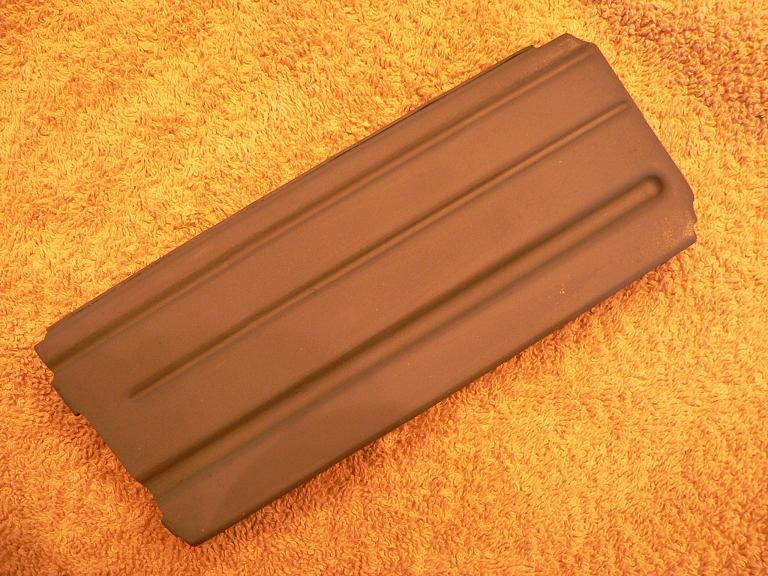
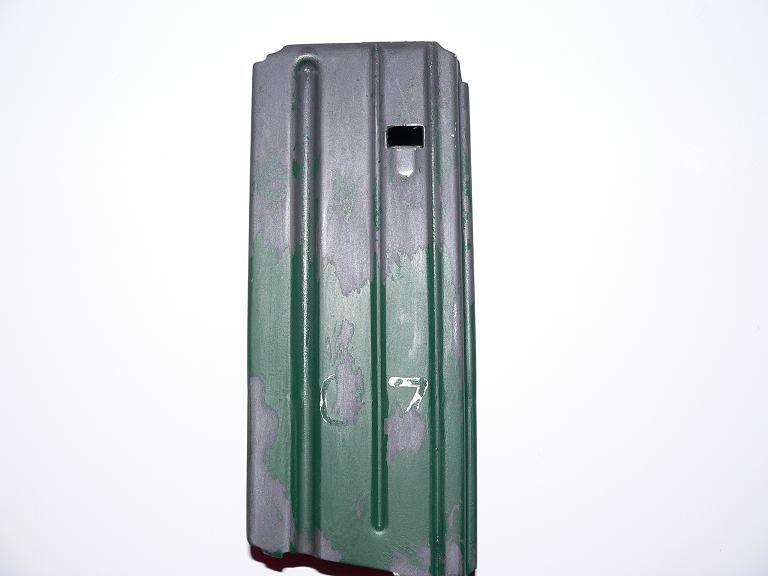
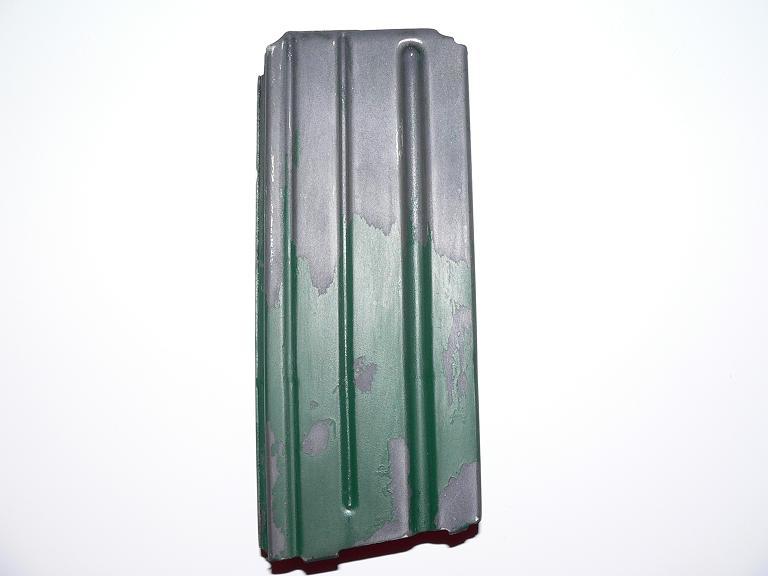
Here are the two mags I started with:
magazine. It is a replica of the very early prototype magazine as pictured in the post below:
http://www.ar15.com/forums/topic.html?b=3&f=123&t=503479
There were several members who requested information on how I made the magazine. Forum member OlGunner sent me two
magazines to work on. I used to them make an instructional guide on constructing a 25 round magazine replica.
The good news is this only takes some very cheap, basic hand tools. No electricity or pneumatic tools are required!
Here's what you'll need:
Small vice
Small square with level
Hacksaw with sharp, fine-toothed blade
Large flat file
Small rat tail file
Flat jewelers file
JB Weld
Toothpicks
12 inch wood clamp (I got mine at Big Lots for approx $5)
Scribe
Straight edge
Ruler
Sandpaper (180 grit, 320 grit, 800 grit)
Perma-Slik dry film lube
Green paint (optional)
Vaseline (optional)
Small paintbursh (optional)
Patience (mandatory)
Here are the two mags I started with:
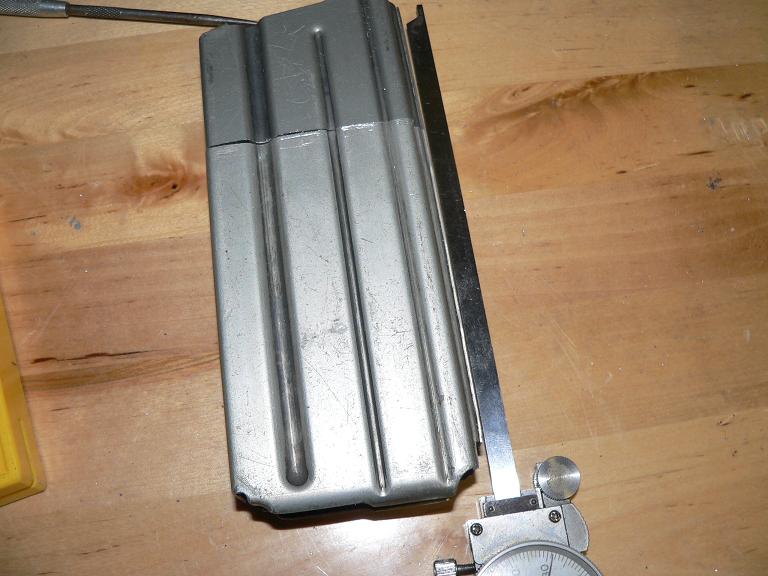
Measure and scribe a line on your first magazine. The line should be about 2.8 inches down from the top of the feed lips. On
this mag, you'll keep the bottom half.
this mag, you'll keep the bottom half.
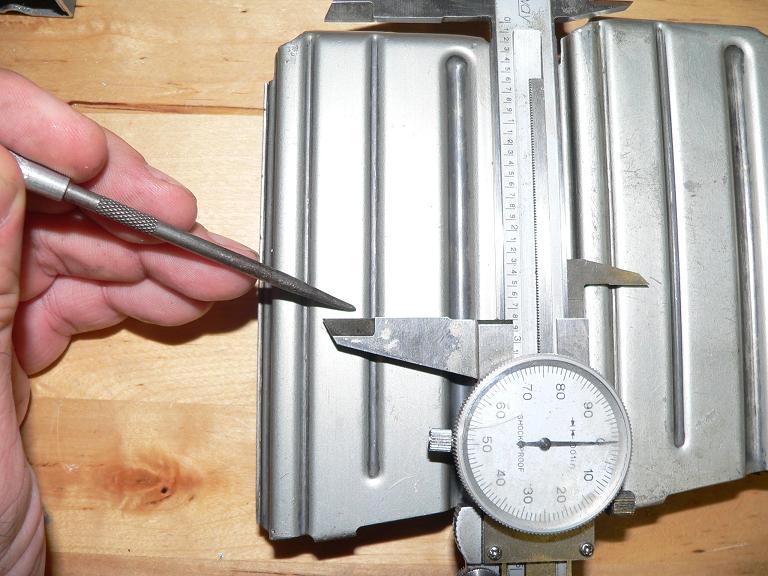
Measure and scribe a line on your second magazine. The line should be just above the tiny rivet (on the front) near the bottom
of the magazine. On this mag, you'll keep the top half.
of the magazine. On this mag, you'll keep the top half.
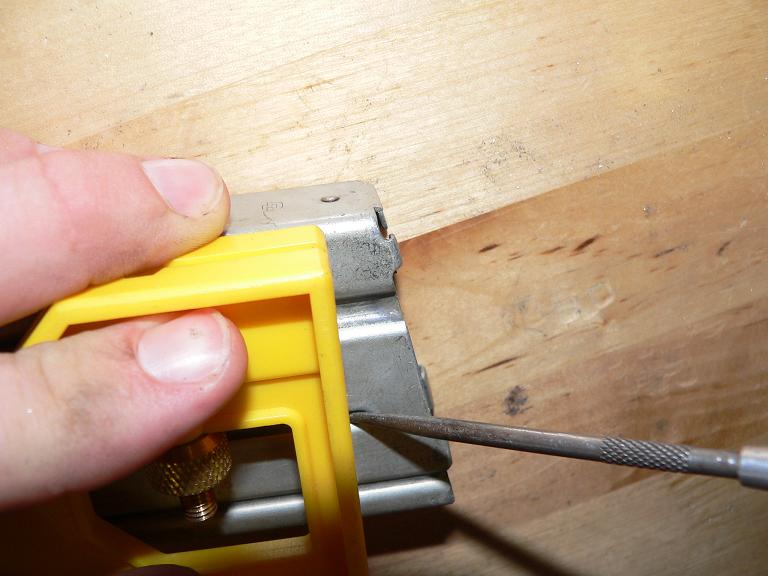
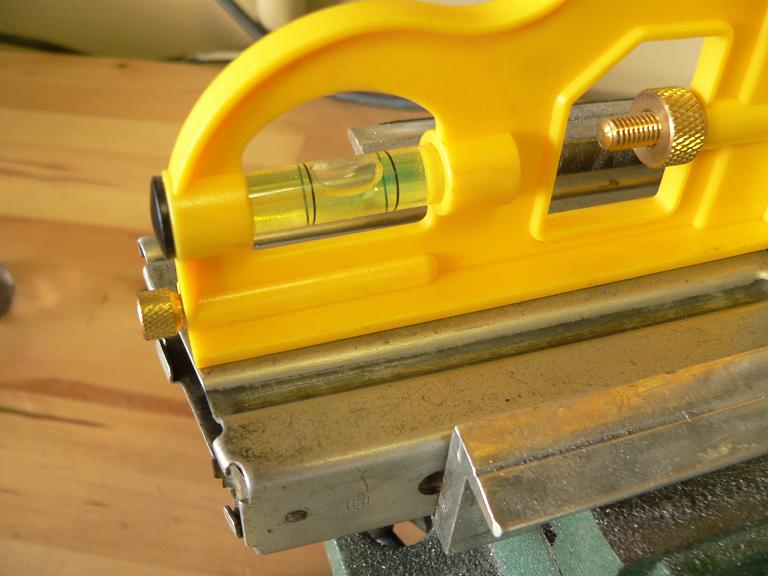
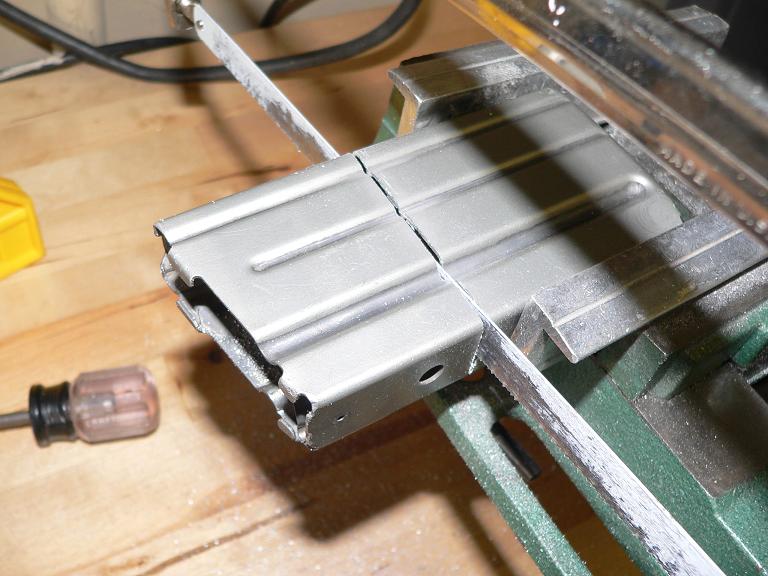
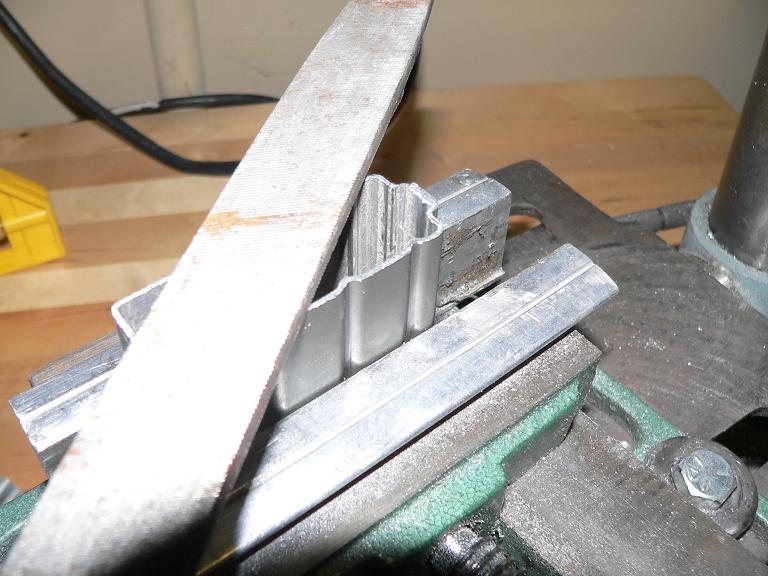
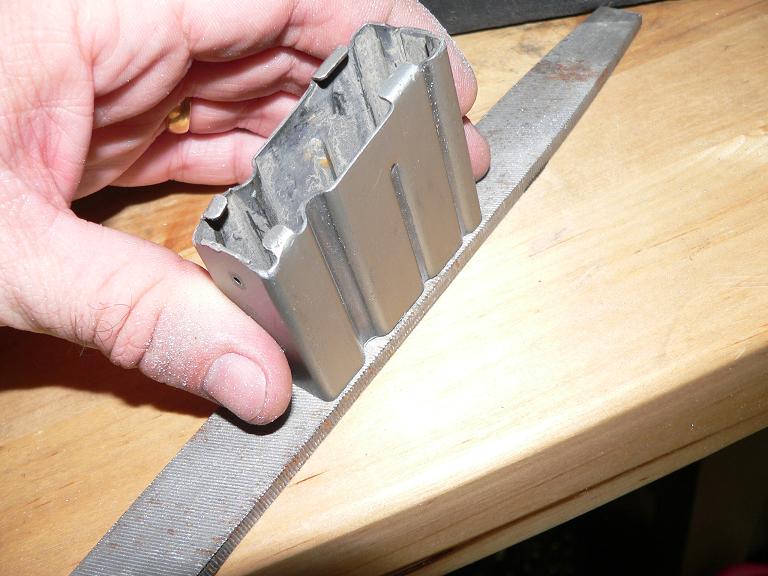
Position the mag in your vice and get it all leveled up. This will help you saw it relatively straight when using your calibrated
eyeball. It doesn't have to be perfect, but the straighter you cut it, the less filing you have to do. Also, it's more time consuming,
but easier to cut straight if you cut it horizontally, as pictured versus standing it up vertically. The initial few strokes with your
saw should be light and pull the saw towards you. Hit the corners first so you can kind of use the initial cuts as a guide. Once
you get though the anodizing, it will cut really easy, but during your initial few strokes, the saw will want to walk all over the
place. Just take your time.
There is a hardened spring steel strip inside the front of the magazine. This is really tough to cut because the teeth of your saw
blade will catch on the steel. I usually have to pull the saw towards me one stroke at a time to get it cut through. Just be
patient and don't try to bend the steel piece out of your way. It will bend in a manner that gets in the way of the magazine
spring and you can't bend it back flush to the inner face of the magazine. Just be patient and you'll get there.
Next make your cut on the second magazine. Do it the same way as your first one.
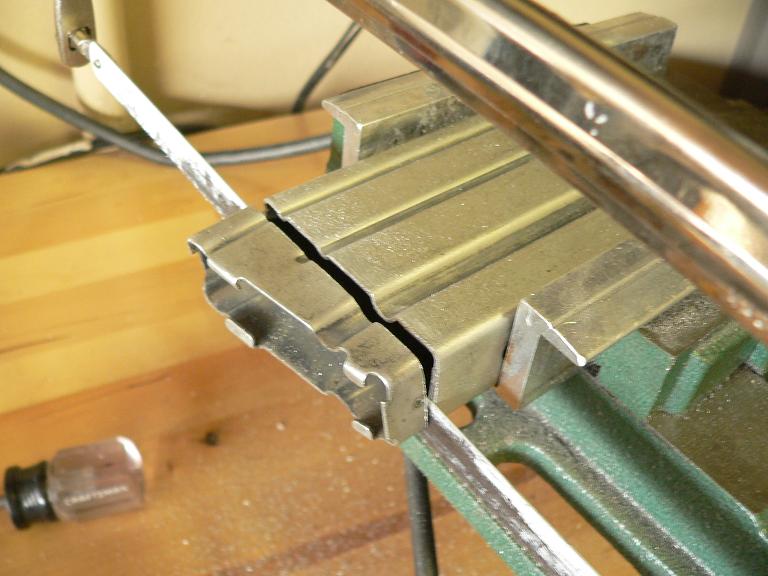
Now just do a test alignment to see if you're in the ballpark. You should be somewhere close. Remember to look at it from
both the sides and the top.
Now just do a test alignment to see if you're in the ballpark. You should be somewhere close. Remember to look at it from
both the sides and the top.
It's time to get your large file out and begin squaring the edges so they align. First file a little off of both mags, then test fit again.
This is just to ensure there were no burrs thowing off your alignment.
This is just to ensure there were no burrs thowing off your alignment.
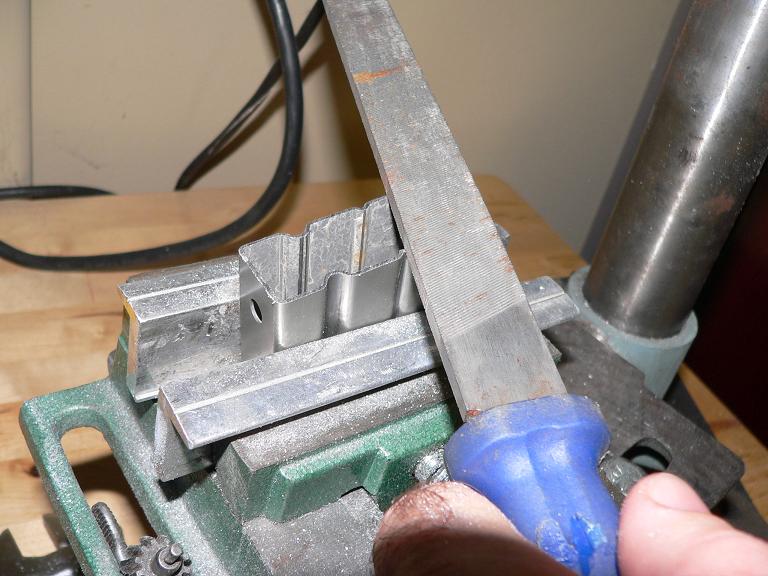
File one mag to get it good and straight, then file the other one to match it. This takes a lot of patience, but the soft aluminum
files really easily, so just work a little and test... work a little and test. You'll slowly see it beginning to align.
files really easily, so just work a little and test... work a little and test. You'll slowly see it beginning to align.
Once it is basically aligned, I lay the file down and lightly “scrub” the magazine on the file to get it nice and square.
Use a variety of straight edges to check your work. Don't trust your eyes because the vertical lines and contrasting colors can
play tricks on you.
play tricks on you.
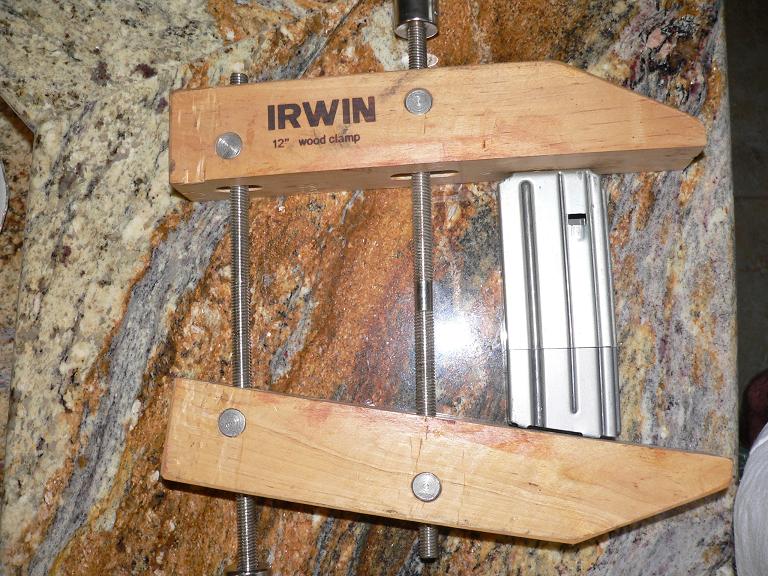
Now it's time to bond the two halves together. The woodworking clamp is awkward to work with. Go ahead and kind of get it
adjusted to accept the shape of the magazine.
adjusted to accept the shape of the magazine.
Mix up your JB Weld per the instructions.
Lightly dab a fine bead of JB Weld along the area you filed.
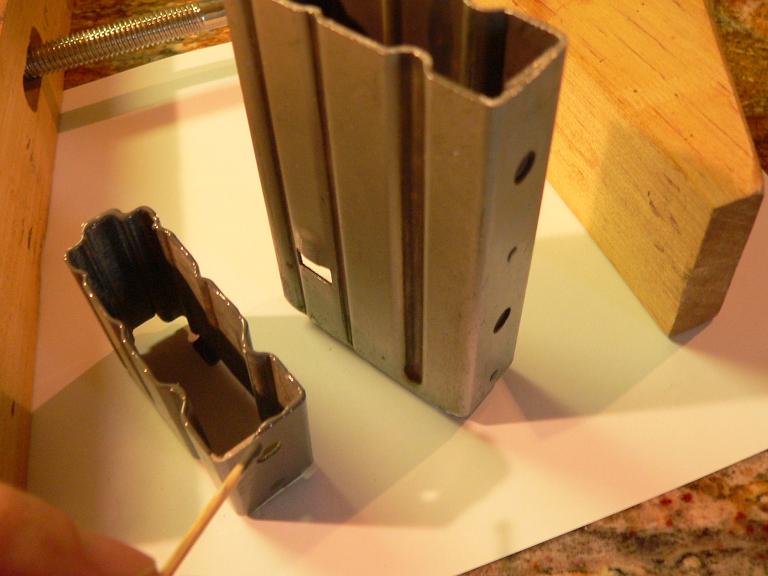
Lay the magazine down flat, on the side without the bump that hooks to the mag release and join the two halves together.
Carefully snug up your clamp. Don't get crazy on torquing it down. Just get it snug enough to put a little pressure on the two
halves.
Carefully snug up your clamp. Don't get crazy on torquing it down. Just get it snug enough to put a little pressure on the two
halves.
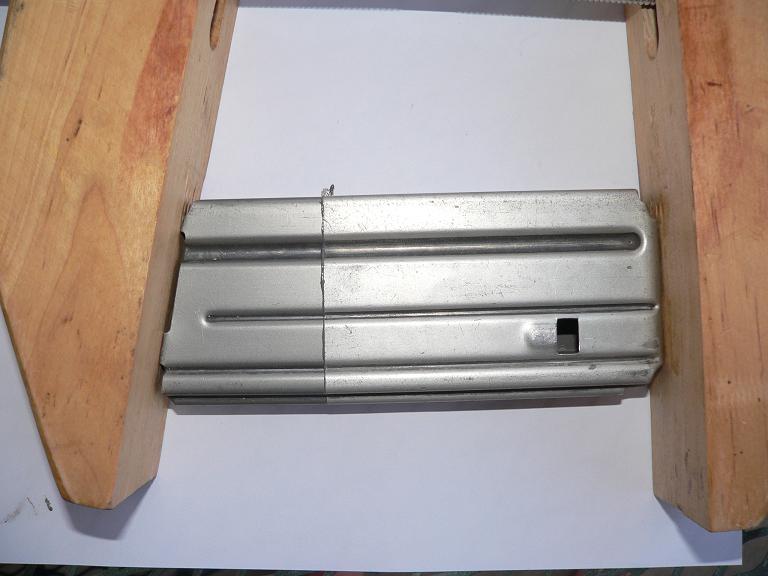
Make certain it is aligned really well... both left and right and top and bottom. The straighter you get it clamped, the less filing
and sanding you'll have to do and the better the finished product will be.
and sanding you'll have to do and the better the finished product will be.
Lay it on some paper so you don't bond it to your table, then allow this to dry overnight.
Next mix up some more JB Weld and apply a nice thin coat to the inside of your seam. This will give your joint some extra
strength.
Next mix up some more JB Weld and apply a nice thin coat to the inside of your seam. This will give your joint some extra
strength.
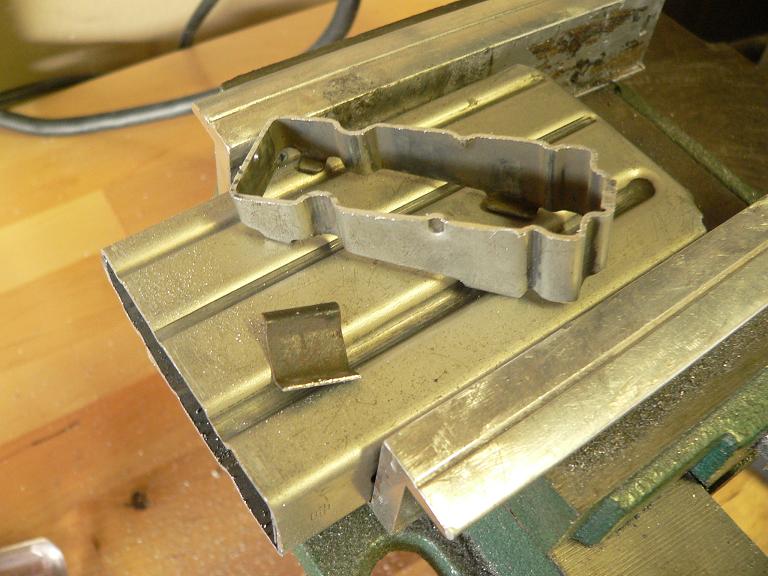
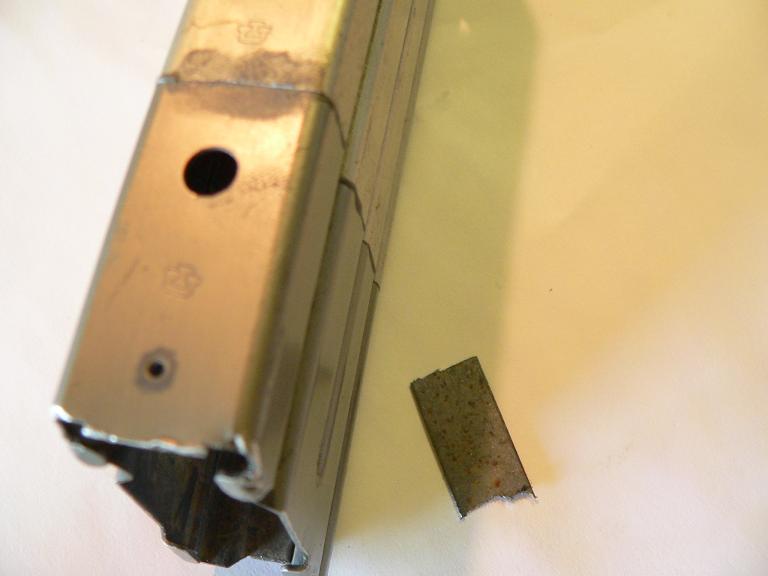
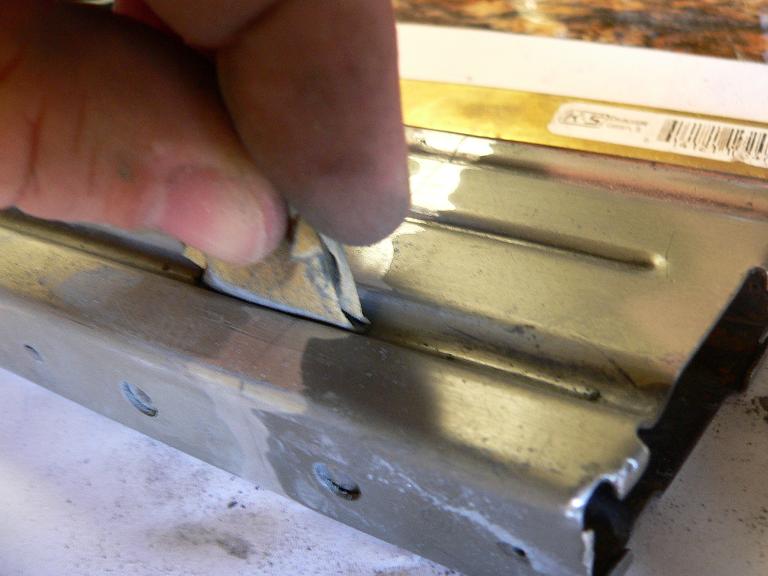
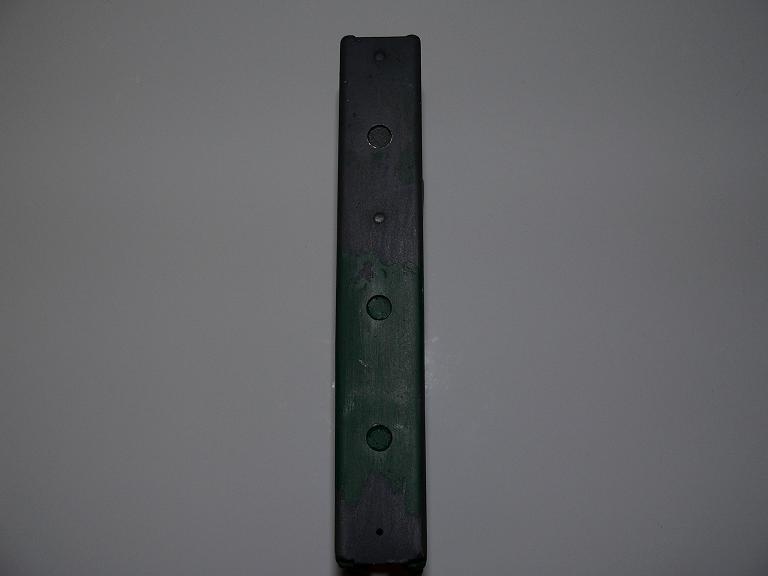
This is also the time to glue down any part of the flat spring steel piece in the front of the mag that may have come undone.
Also if there is an exposed hole, you can cut a small piece of scrap from your discarded magazine halves to fill the hole with.
Also if there is an exposed hole, you can cut a small piece of scrap from your discarded magazine halves to fill the hole with.

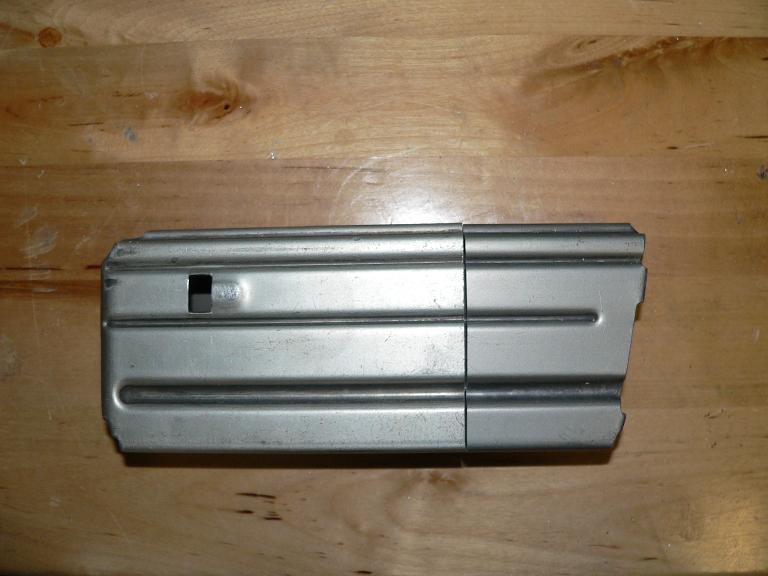
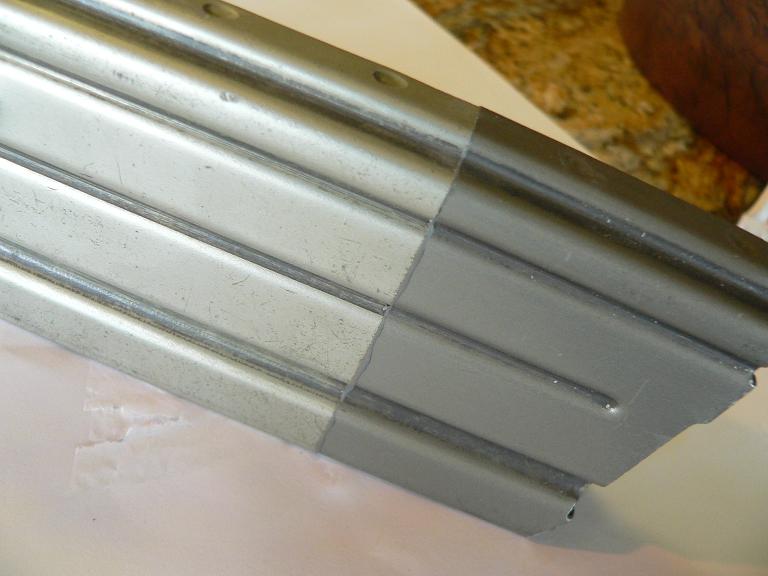
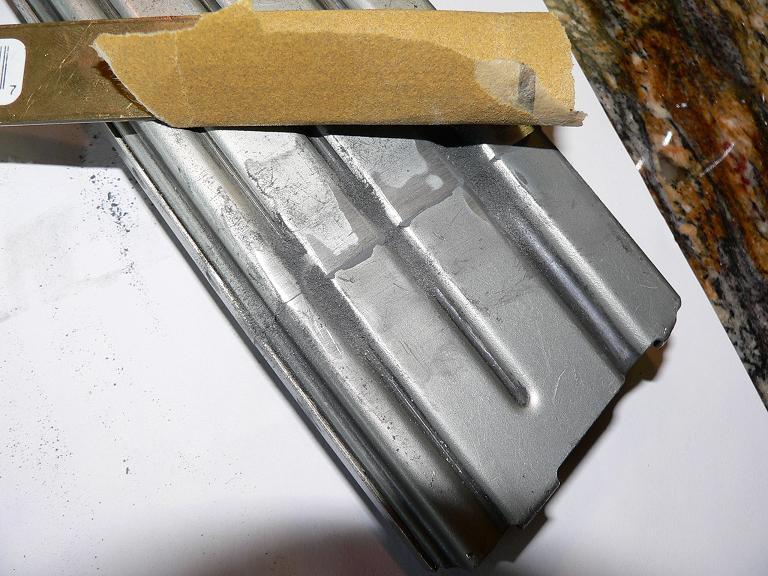
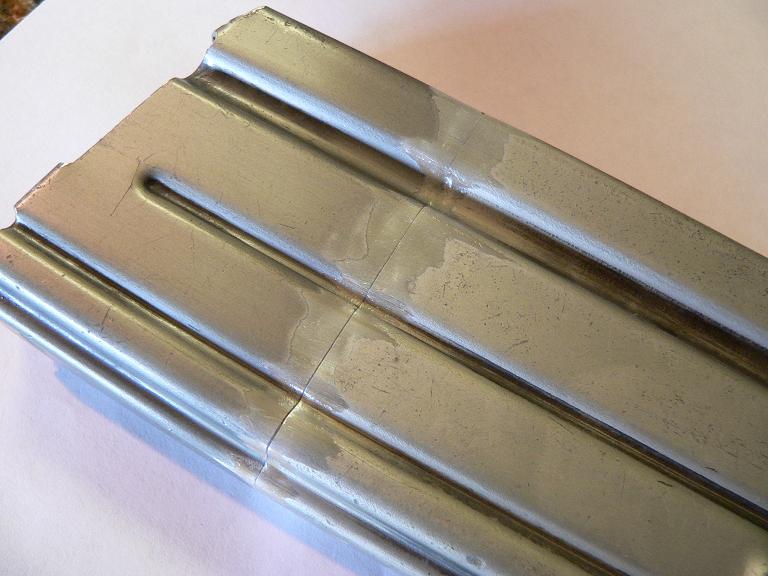
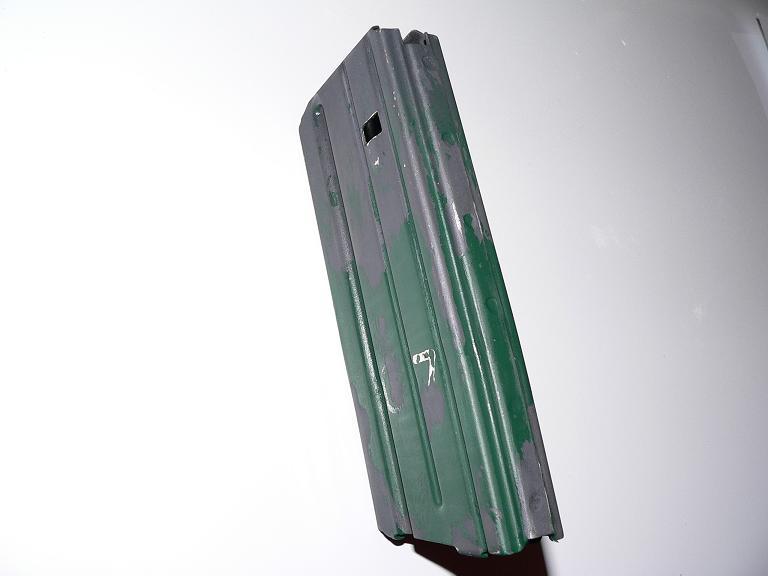
Now you can begin using your small files and sandpaper to smooth the seams. Use some cheap spray paint to cover the seam
and lightly sand, keep repeating this until everything is nice and smooth. This is the critical step in making sure the seam is
invisible. Please take your time and be patient. This work will pay off in the long run.
and lightly sand, keep repeating this until everything is nice and smooth. This is the critical step in making sure the seam is
invisible. Please take your time and be patient. This work will pay off in the long run.

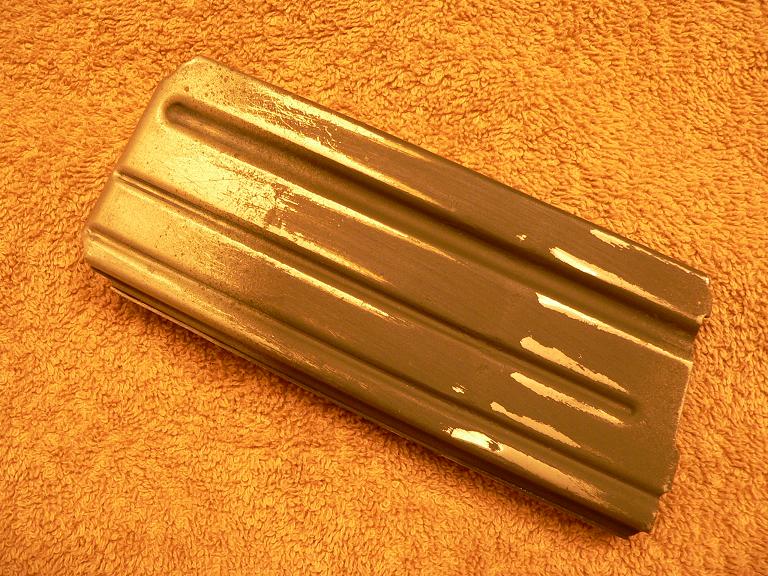

Paint the magazine with the Perma-Slik dry film lube. If you don't have this (this is the correct finish), you can use a dark or
medium gray spray paint.
Let this dry overnight. If you like this look, you are finished.
medium gray spray paint.
Let this dry overnight. If you like this look, you are finished.
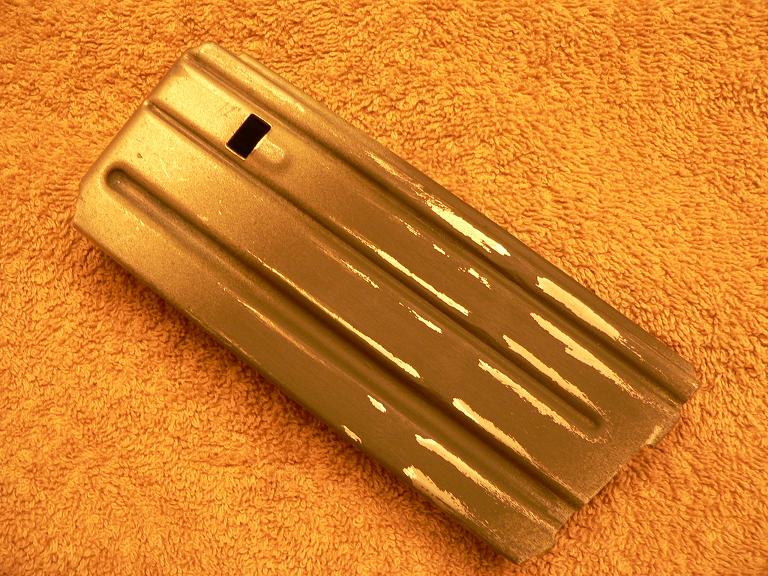
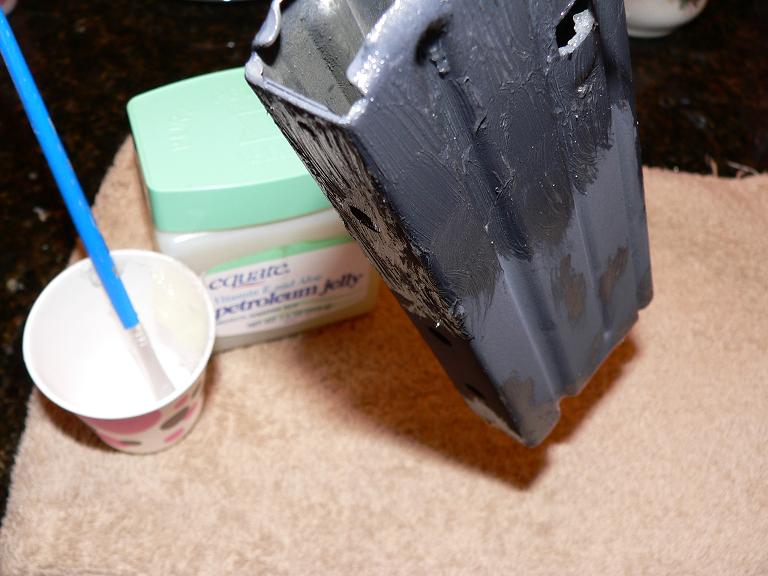
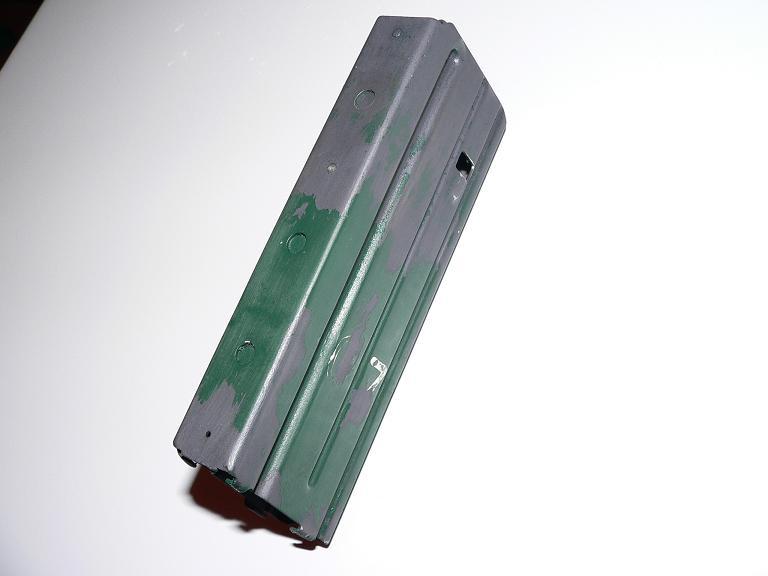
If you want to add the worn green paint like the originals, it's time to get out the Vaseline.
Take a flat paintbrush and apply the Vaseline to areas where you want the gray finish exposed. You'll notice on the original
mags the green only remains on the bottom half of the mags, so I go heavy on the Vaseline near the top and just put some
dabs here and there on the bottom. If you've never done anything like this before, I'd recommend practicing on some scap
pieces of metal... maybe even your unused mag halfs you have left over from your cutting.
Now paint the mags completely with the cheap green spray paint. It's your creation, so add some markings or numbers if
you'd like.
you'd like.
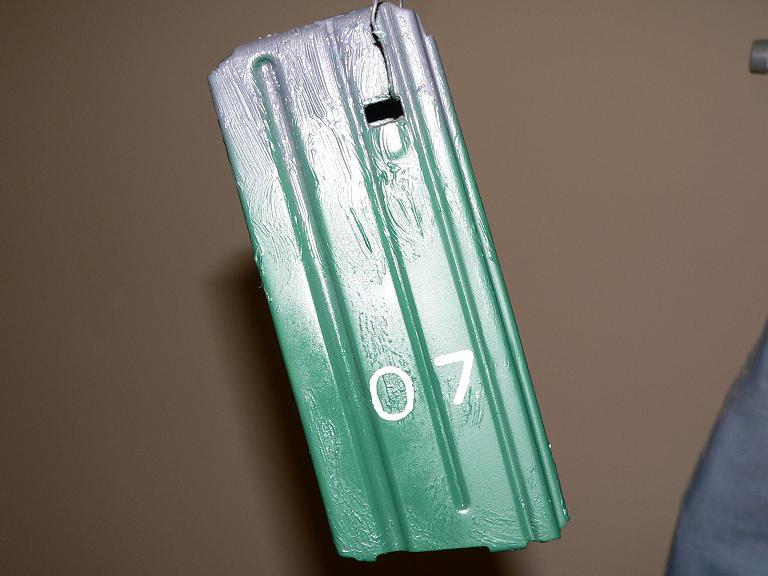
Let it dry overnight. Now go to your kitchen sink and get the water really hot. This will help soften the Vaseline and release the
green “flakes.” You may have to carefully use your fingernail and lightly scratch at the green paint to get it to release.
Lightly scrub around on the mag and you'll get the paint to begin to “flake” off.
At this point, if you're happy with the look, call it good. If you don't like how it came out, sand it smooth and reapply your
finish. Sometimes if you are going to re-attack, it's better to sit it out a week and get a second wind.
Carefully install the follower, spring (I use a 30 round mag spring), and floorplate.
Please understand these mags are more for cosmetics than actual use. I imagine they would be okay to use, but I can't promise
the JB Weld will hold up with the spring pressure and weight of the ammo plus recoil. After all the work you went through, I'd
suggest just using these for display.
If you have any questions, feel free to email me at jntmjt1@yahoo.com
That's it. All I ask is if you try this out, please post some pictures and share your experiences.

RETRO BLACK RIFLE - RETRO FAUX 25RND MAGAZINE BUILD TIPS
| | | | | | |
| "RETRO" BUILD GUIDE |
| .223 Cal / 5.56mm |